github+jenkins自动化持续部署
工作流程
- 提交代码到github触发webhooks通知jenkins
- jenkins拉取代码构建,发布
准备工作
github仓库
- 新建代码仓库

添加webhook
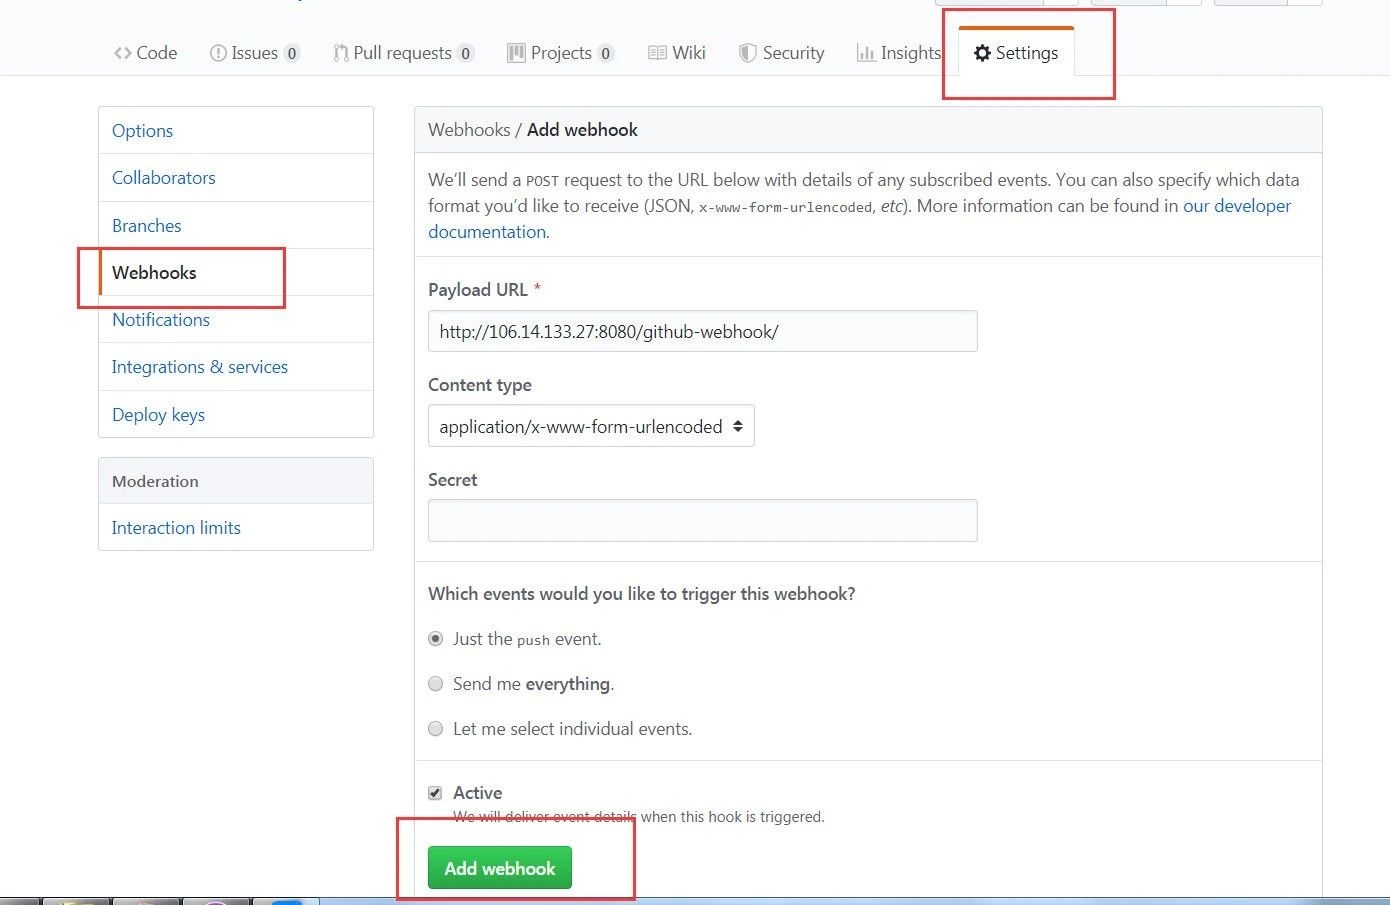
创建github access tokens
用户 -> Settings -> Developer settings -> Personal access tokens -> Generate new token
新建后复制token,离开页面后就看不到了
jenkins上添加github token
管理jenkins -> 系统管理 -> 找到 Github 服务器
没有的话先安装 Github Plugin 插件
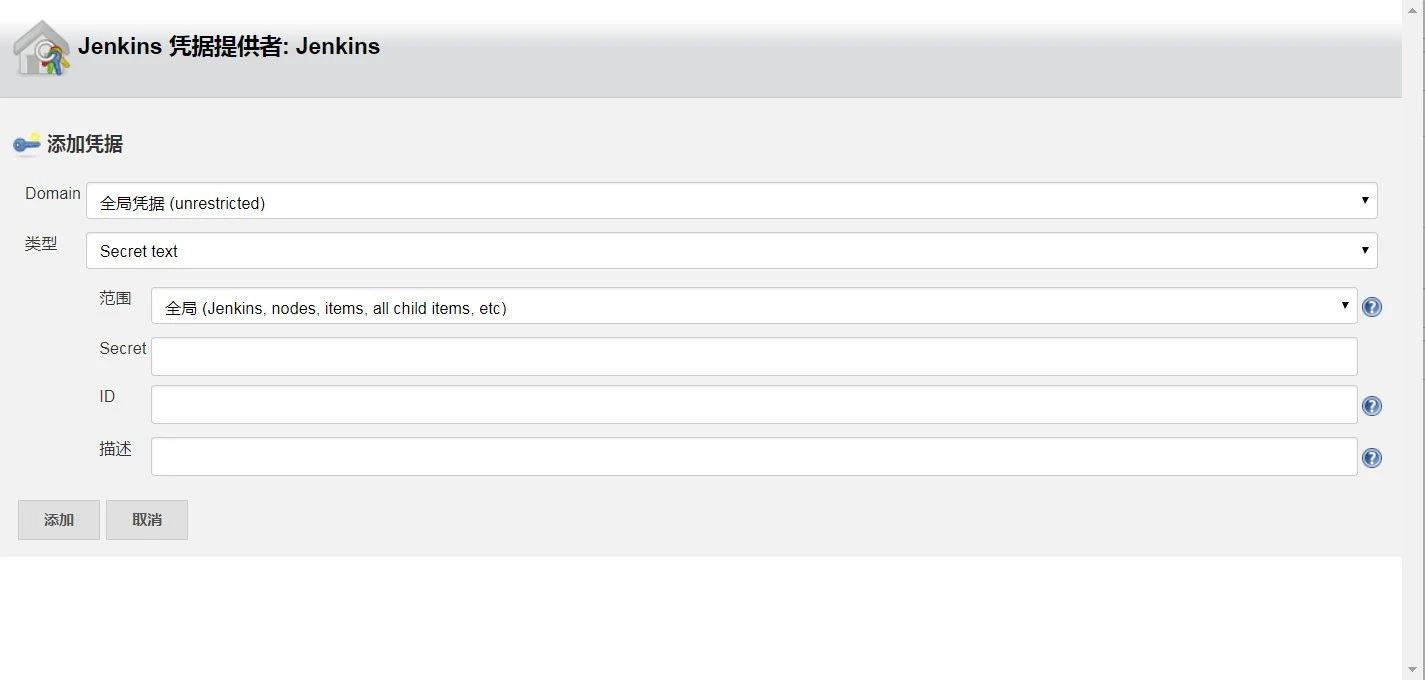
Secret 就是刚刚生成的token
添加后可以点击连接测试,成功会显示github的用户名。
新建任务
构建一个Maven项目
新建任务 -> 构建一个Maven项目

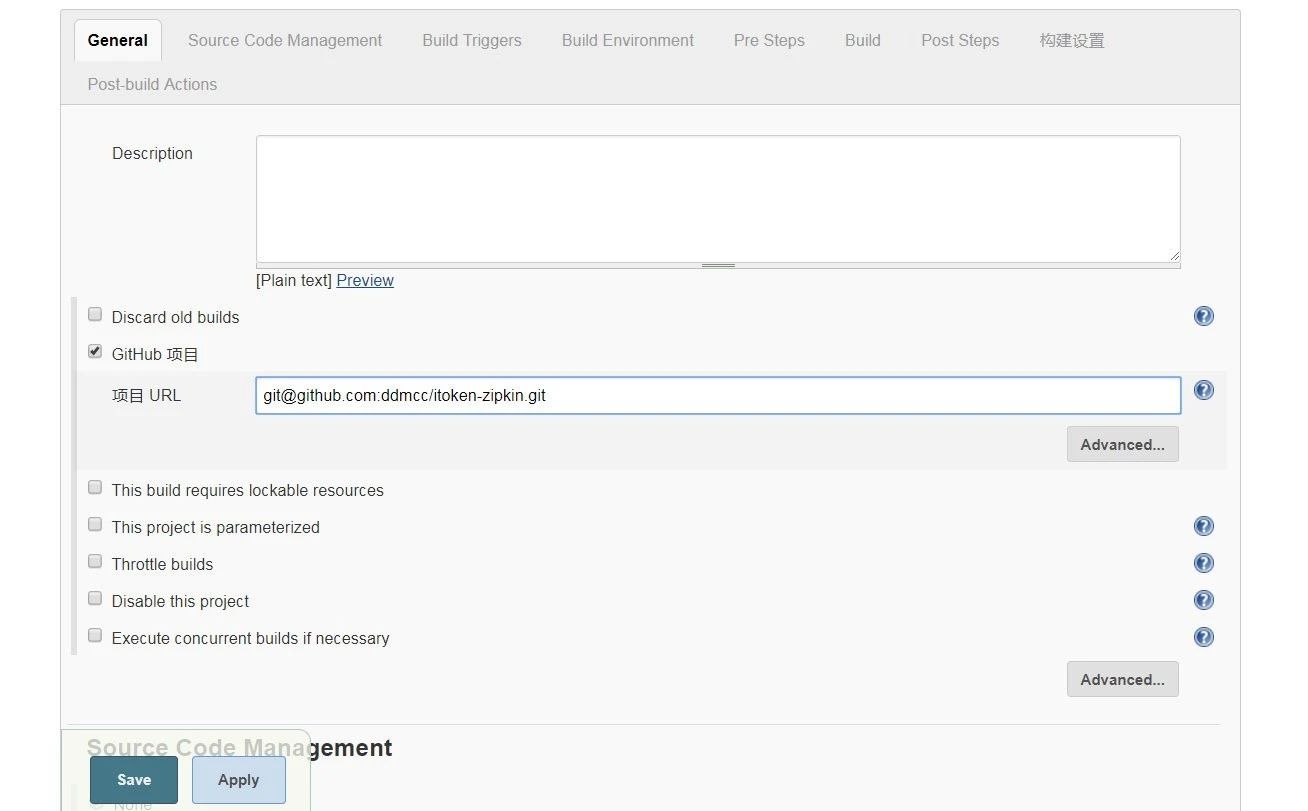
填入项目地址
github项目 -> 填入项目地址
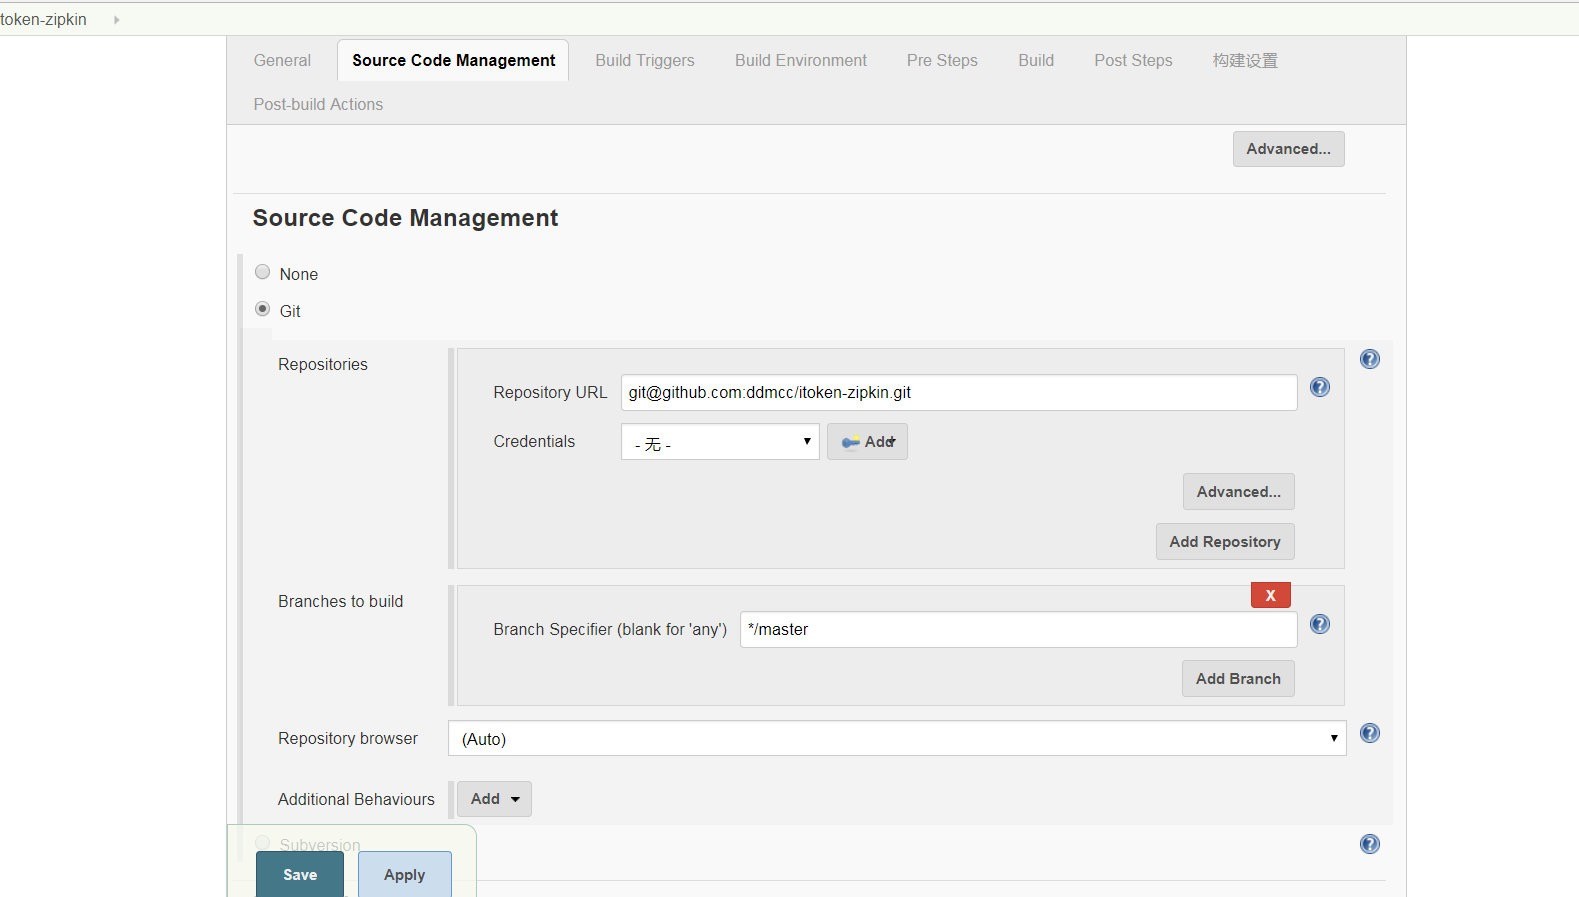
Git -> 填入项目地址
Source Code Management -> Git -> 填入项目地址
勾选触发器
Build Triggers -> 勾选 GitHub hook trigger for GITScm polling
编写脚本
Post Steps -> Execute shell -> 填入脚本
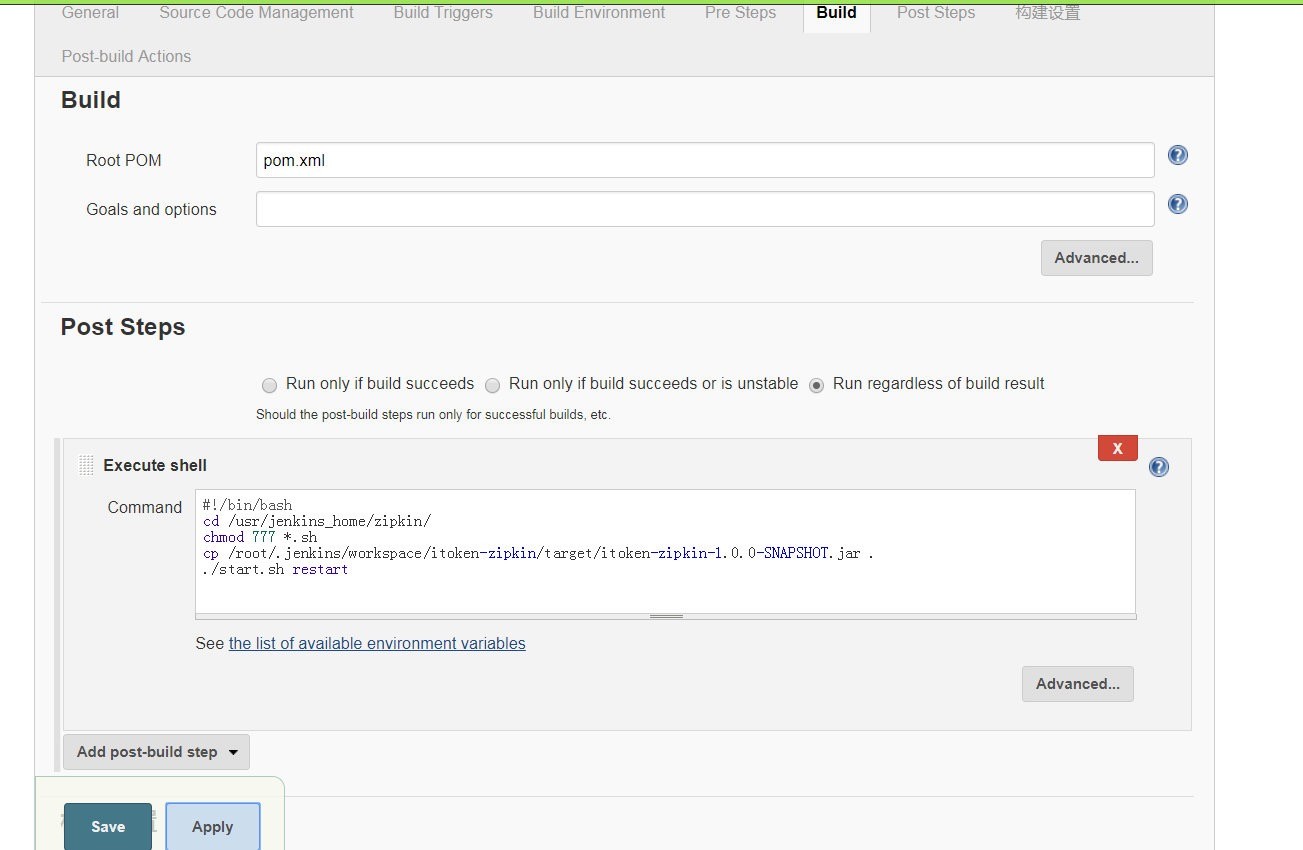
start.sh:
export ZIPKIN=itoken-zipkin-1.0.0-SNAPSHOT.jar

export PORT=9411

case "$1" in

start)
    ## 启动ZIPKIN
    echo "--------ZIPKIN 开始启动--------------"
    BUILD_ID=DONTKILLME
    nohup java -jar $ZIPKIN --server.port=$PORT --spring.profiles.active=prod >/dev/null 2>log &
    ZIPKIN_PID=`lsof -i:$PORT|grep "LISTEN"|awk '{print $2}'`
    until [ -n "$ZIPKIN_PID" ]
        do
          ZIPKIN_PID=`lsof -i:$PORT|grep "LISTEN"|awk '{print $2}'`
        done
    echo "ZIPKIN_PID is $ZIPKIN_PID"
    echo "--------ZIPKIN 启动成功--------------"
    ;;

 stop)
    P_ID=`ps -ef | grep -w $ZIPKIN | grep -v "grep" | awk '{print $2}'`
    if [ "$P_ID" == "" ]; then
        echo "===ZIPKIN process not exists or stop success"
    else
        kill $P_ID
        echo "ZIPKIN killed success"
    fi
    echo "===stop success==="
    ;;

restart)
    $0 stop
    sleep 5
    $0 start
    echo "===restart success==="
    ;;
esac
exit 0
工作
git提交代码或直接github上修改代码触发。